

How To Use A Cooking Thermometer

Most of us know that an instant read thermometer is one of those tools where, if used properly, it’s an absolute essential.
Unless you've got x-ray vision, knowing how well done a food is on the inside, from looking at it from the outside, is impossible!
Some people swear by checking that the juices run clear for ‘doneness’ of meat. This is a terrible idea.
The reason why raw meat has a red or pink color is because of a molecule called myoglobin. The theory behind checking for clear juices is that myoglobin loses its color when heated.
However, the point it changes color can change.
For example, I’ve cooked chicken breast to 155°F (well under the 165°F recommended by the United States Department of Agriculture) and the juices have been clear.
Another chicken breast was cooked to 170°F, 5°F over the USDA’s guideline, and yet it oozed pink juices!
No, the only way you can be sure you are serving your loved ones meat that is cooked through (whilst also not serving them burnt dust) is by using a cooking thermometer.
But many people wonder where to place the meat thermometer, and how to get the most accurate reading.
We’ve put together a step-by-step guide that will eliminate all your issues.
1) Use An Instant Read Thermometer, And Not A Leave In One
Most people are aware of trying to hit the center of the meat, as this is naturally where you would expect the coolest point to be.
Hypothetically, this would be correct……..if meat was this smooth sphere of matter!
In reality, meat has bones, water, fat, muscle and connective tissue, all of which heat up at different rates.
It’s one of the reasons why I advocate using an instant read thermometer, instead of a leave in thermometer as, with a leave in model, you’re essentially guessing where the coolest part of the meat is.
2) Find The Coolest Part Of The Meat By Pushing The Thermometer Through The Center Until It Emerges On The Other Side
Don’t worry about hitting the absolute center, just aim for the general area, and push the thermometer probe through until it pops out on the other side.
In case of big roast, such as a prime rib with bone or a whole turkey, where pushing the probe right through is impossible, push through until you hit bone.
When you first push the thermometer through, the reading should jump up and then start to drop as it reaches the coolest point.
As you carry on pushing the probe through until it pops out on the other side, the temperature should start rising again.
Please note, I do not recommend you check for the coolest temperature whilst initially pushing the probe in.
I find that, when I’ve attempted this, the probe jumps forward in bursts as I apply pressure as it goes through different materials, such as connective tissue, fat etc and it makes it hard to get accurate readings.

3) Retract The Thermometer Probe Through The Meat
By slowly retracting the probe back through the meat, you can check for the lowest temperature as you hit the coolest point. This is the temperature you should go by.
As you’ve already ‘punctured’ your way through, pulling the thermometer out is a much smoother process, and you get a much more accurate reading.
Now, of course you might be thinking, ‘How can I tell that the place I pushed my cooking thermometer through has the coolest part somewhere in there?’ The truth is, without using several probes going through in different directions, you can’t.
But this technique of pushing the probe right through, and then checking the temperature as you withdraw, is much more accurate than just pushing a probe in and hoping for the best!
The above technique has definitely produced the most consistent readings for me, and my 10 year old daughter and partner are yet to suffer any food poisoning from my hands – a great result!
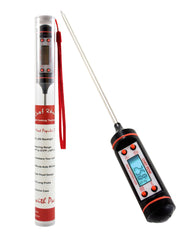
Why not grab yourself the Chef Remi Cooking Thermometer right now?
They're currently on offer at only $11.99! But you can get a further 15% OFF your entire order today! (Limited Offer).
Comments
No comments yet.